Table of contents
PermalinkWhat is CSS? 👨💻
CSS stands for Cascading Style Sheets. It is the language for describing the presentation of Web pages, including colors, layout, and fonts, thus making our web pages presentable to the users. If HTML were the engine components of a car, CSS would be the body style and the paint job. A website can run without CSS, but it certainly isn’t pretty. CSS makes the front end of a website shine and it creates a great user experience. Without CSS, websites would be less pleasing to the eye and likely much harder to navigate in addition to layout and format.
Cascading: Falling of Styles
Style: Adding designs/Styling our HTML tags
Sheets: Writing our style in different documents
PermalinkWhat are the Benefits of CSS? 💪
Permalink-> There are a number of benefits of CSS
Faster Page Speed
Better User Experience
Quicker Development Time
Easy Formatting Changes
Compatibility Across Devices
PermalinkWhy Is CSS so important?
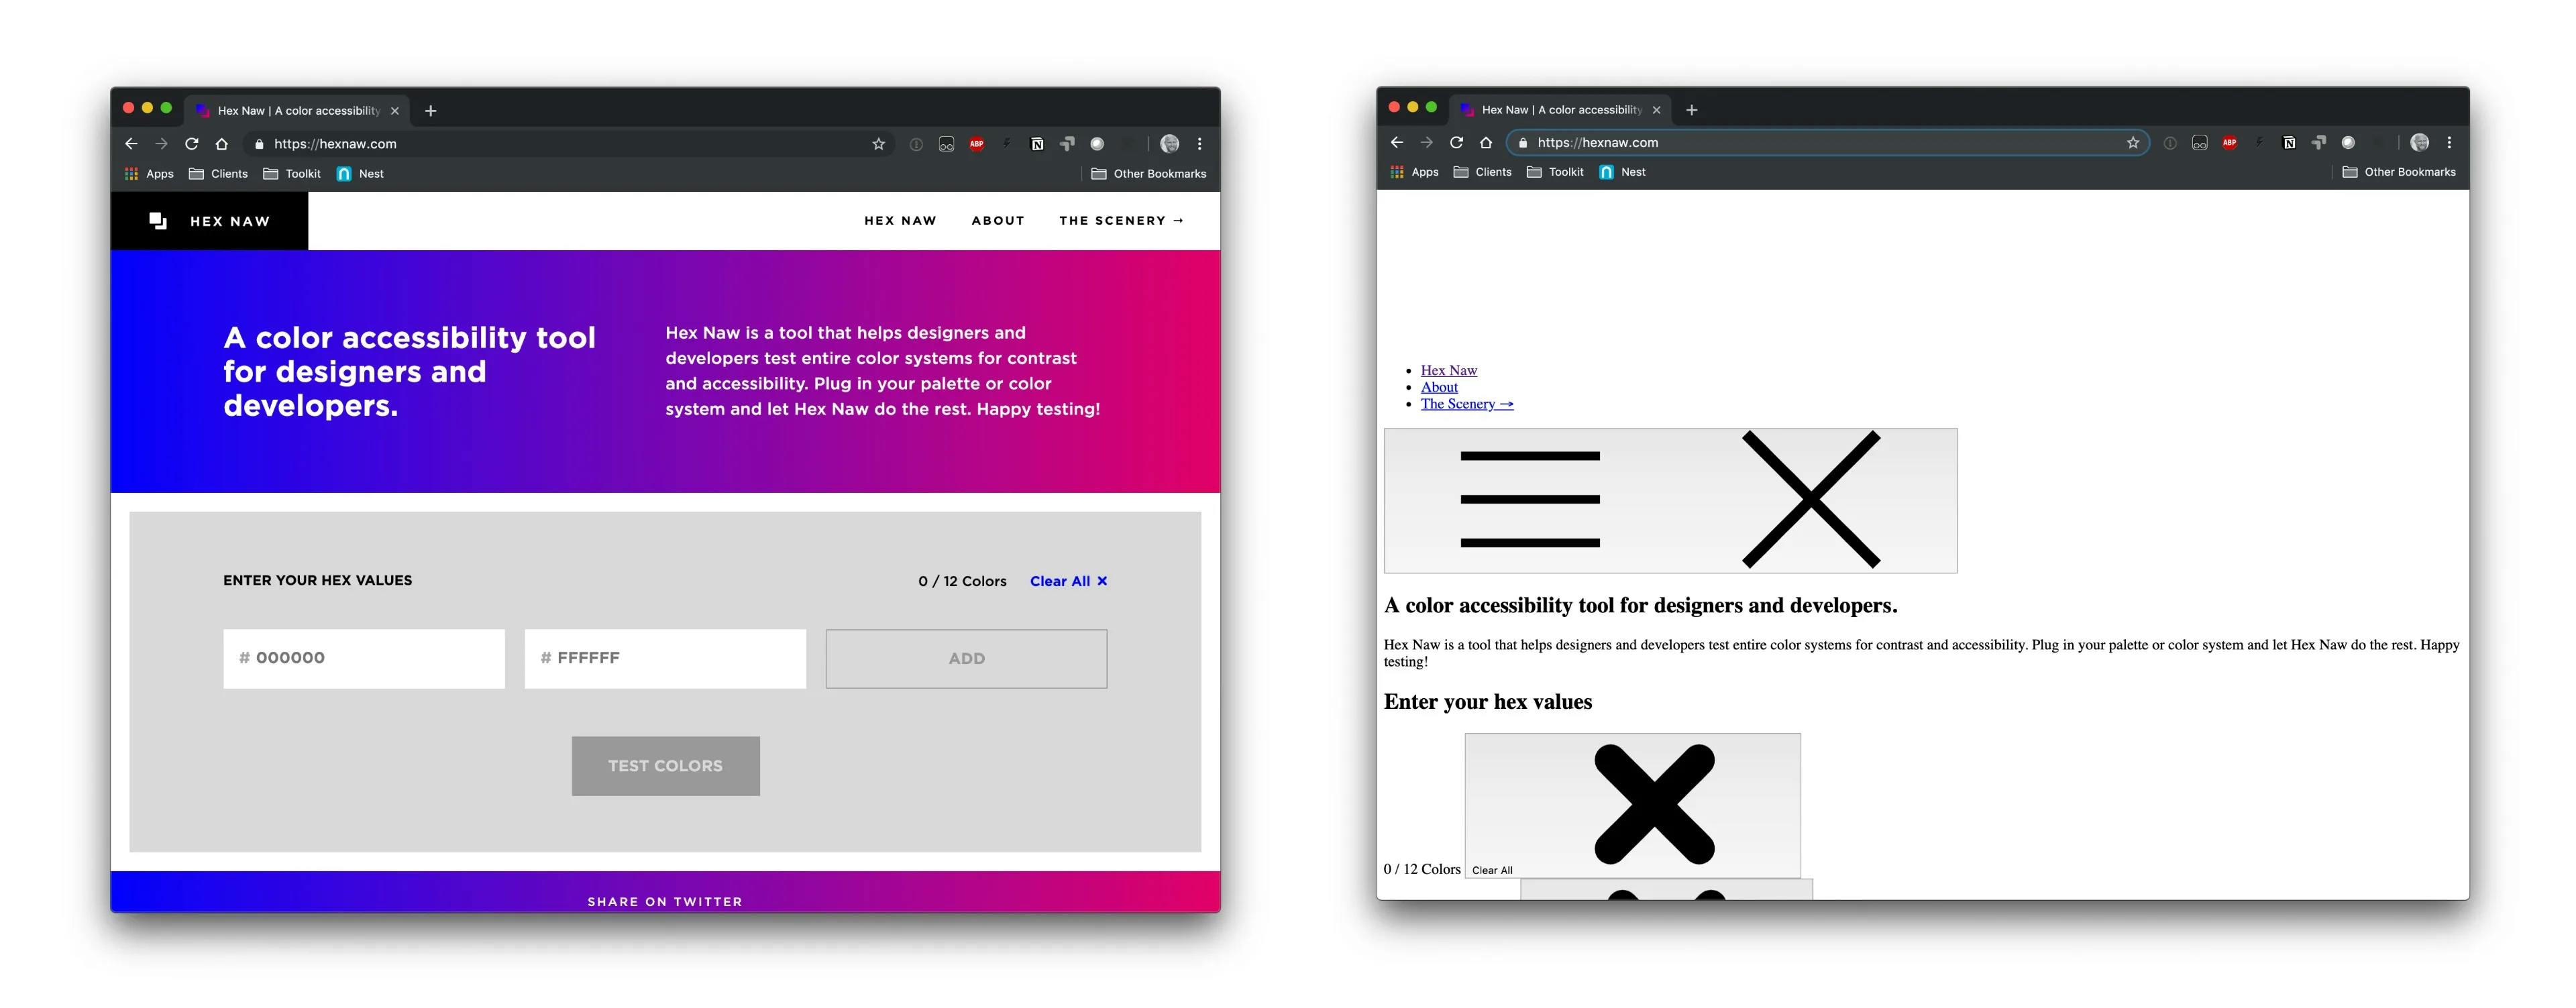
To illustrate the importance of CSS here’s an example of a page with and without CSS ⬇️

PermalinkCSS Syntax -
Selector {
  Property 1: value;
              Property 2: value;
              Property 3: value;
        }
/* For example: */
    h1
       {
           Color: red;
            Text-align: center;

       }
     #unique
      {
            color: green;
      }
PermalinkIntroduction to CSS Selectors ⬇️
Selectors are used to targeting one or more HTML elements to apply our CSS rules. There are different kinds of selectors that we use in CSS and here are the 5 leading selectors:
Element selector
Id selector
Class selector
Attribute selector
Universal selector
Note : Note: CSS files must be imported first to HTML so the selectors & rules can be applied to elements.
PermalinkSuppose that we have 4 elements in our HTML page ⬇️
<body>
  <h1> Headline 1 </h1>
  <h1> Headline 2 </h1>
  <p> Paragraph 1 </p>
  <p> Paragraph 2 </p>
</body>
➡️ Now let’s see how the selectors above affect our code one by one.
PermalinkElement Selector:
The element selector targets HTML elements based on their tag name.
For example, to target the
tags only, we can use an element selector. Simply, I just need to write the element name and define the rules:
p {
  color: red;
  font-size: 20px;
}
The element selector above selects all the P tags on our page and applies the rules of color & font size.
Other elements won’t be affected, however, if I want to target the h1 tags too, this time I need to add h1 as a selector name as well:
h1 {
  color: blue;
  font-size: 30px;
}

PermalinkId Selector:
It basically selects an element with a specified id. To give an id to an HTML element we need to use the id attribute and then give a name.
<h1 id="first-headline"> Headline 1 </h1>
Note: For selecting elements with an id, we write the name of the id and put a hash in front of it:
#first-headline {
  color: purple;
  font-size: 30px;
}
Note: The hash with a name means that it is an id selector and without the hash, we can’t target elements with id’s.
PermalinkClass Selector:
There is another selector type and is maybe the most used one in daily programming, which is the class selector. A class selector targets one or multiple elements at once with a specifically given class attribute and regardless of their tag names.
<h1 class="my-first-class"> Headline 1 </h1>
We define a class selector like we define an id, but we must put a period character instead of a hash:
.my-first-class {
  color: green;
}
Note: We can also add multiple classes to an element
<h1 class="my-first-class small-font italic"> Headline 1 </h1>
PermalinkAttribute Selector
Another type of selector in CSS is the attribute selector. The attribute selector targets elements with a specified attribute and a value. This type of selector can be useful in input fields, for example.
<body>
  <input type="text" />
  <input type="number" />
</body>
Suppose that we have 2 different input fields, one type for text and another for numbers only, we can give different styles based on their attribute types.
So when I need to write rules only for number inputs for example, I need to define an attribute selector (after the name of the tag inside the brackets by writing the name of the attribute and its value) like below:
input[type=number] {
  background: gray;
}
Note: The rules will be applied only for number-input fields.
PermalinkUniversal Selector
The last important selector I’d like to mention is the universal (*) selector. The universal selector targets all of the elements on the page at once and applies all of them to the same rules.
To define the universal selector, we use only the asterisk character in order to select all of the elements.
* {
  font-size: 20px;
}
❤️ Thanks For Reading
